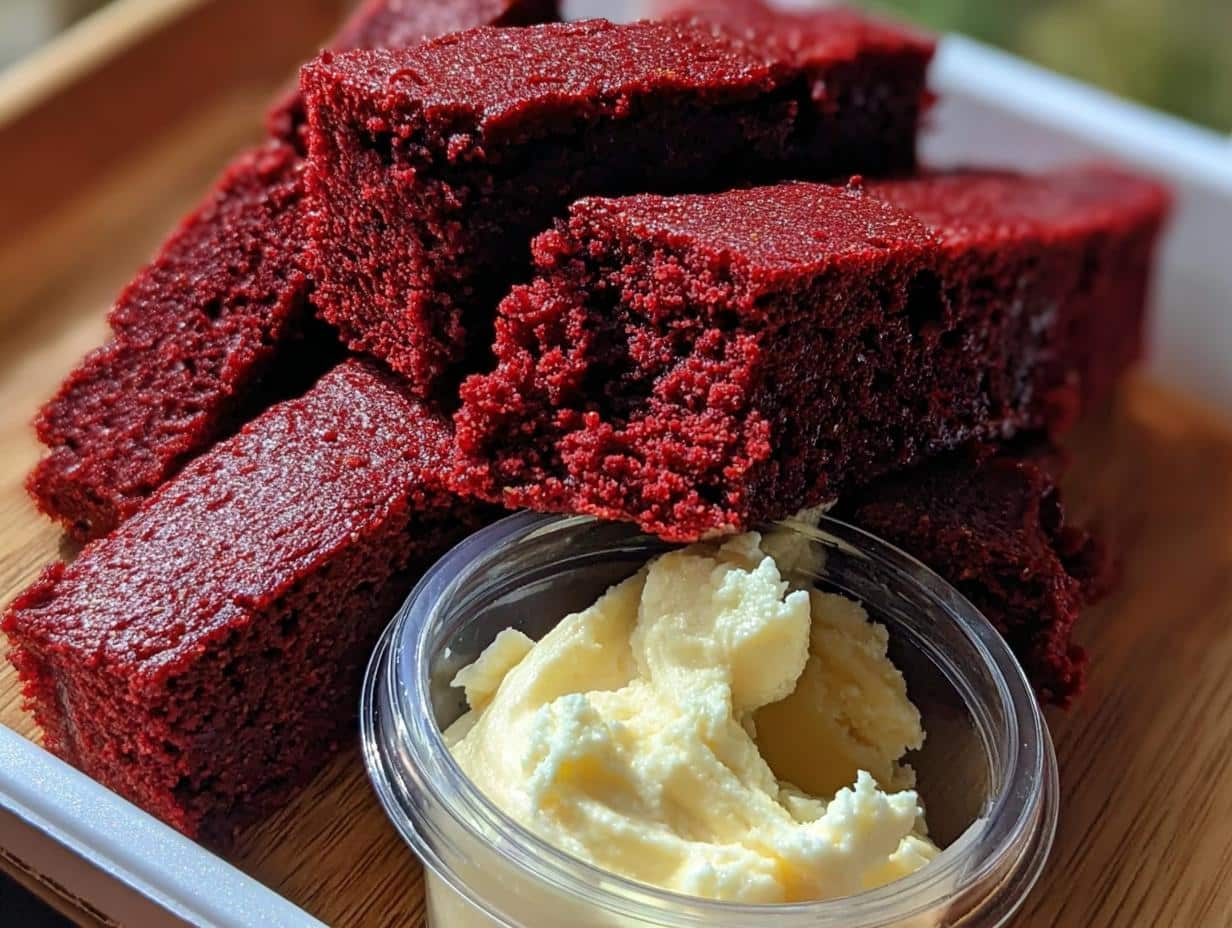
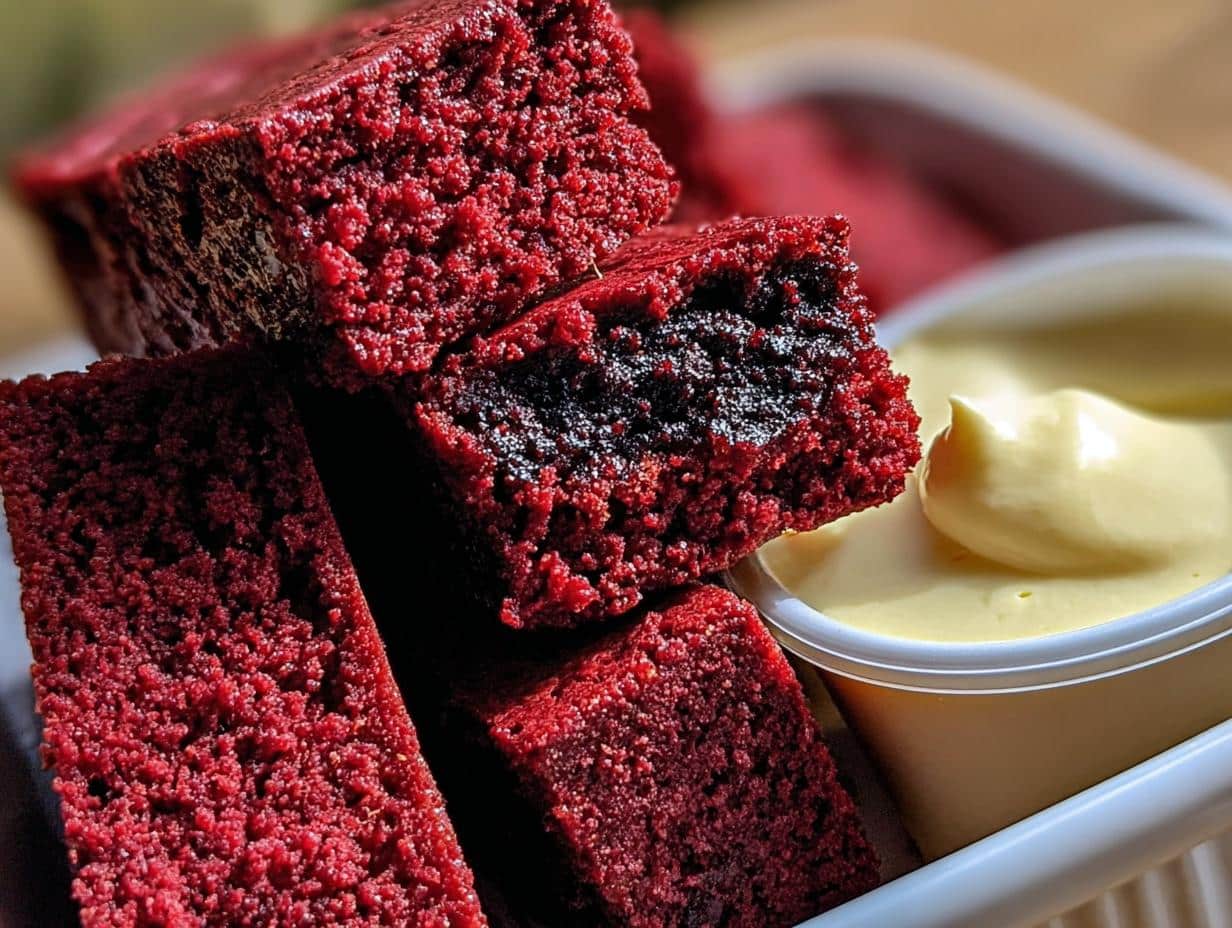
Red velvet brownies have a special place in my heart, bringing back memories of childhood bake sales and cozy family gatherings. There’s something magical about that deep red hue and the rich, chocolatey flavor that just screams celebration. This red velvet brownie recipe is my go-to for a reason – it’s incredibly easy to whip up and always delivers a perfectly fudgy texture, making it the ultimate homemade red velvet brownie experience. The aroma of cocoa and vanilla filling my kitchen as they bake is simply divine, and the contrast with the cool, creamy cheesecake dip is pure bliss. Let’s get cooking!
Why You’ll Love This Red Velvet Brownie
- The taste is simply divine – a perfect balance of rich chocolate and classic red velvet flavor.
- It’s an easy red velvet brownie to make, perfect even for beginner bakers.
- You’ll spend less time in the kitchen thanks to its quick prep time.
- It’s a crowd-pleasing dessert that the whole family will adore.
- This recipe is budget-friendly, using common pantry staples.
- The texture is wonderfully fudgy, making it a truly decadent treat.
- It’s an easy red velvet brownie that’s perfect for parties or a weeknight treat.
- The vibrant color makes it a visually stunning dessert for any occasion.
Ingredients for Red Velvet Brownie
Gathering your ingredients is the first step to creating this amazing red velvet brownie. You’ll need the essentials to form the rich red velvet brownie batter, plus everything for that dreamy cheesecake dip. I love having fresh ingredients on hand for baking, it really makes a difference!
- 1 cup unsalted butter, melted – this provides richness and helps create that fudgy texture
- 1 1/2 cups granulated sugar – for sweetness and structure
- 1 tbsp red food coloring – the key to that iconic vibrant color
- 2 tsp vanilla extract – enhances all the sweet flavors
- 4 large eggs – bind everything together and add moisture
- 1 1/4 cups all-purpose flour – the base for our brownie
- 1/4 cup unsweetened cocoa powder – for that deep chocolate flavor
- 1/2 tsp salt – balances the sweetness
- 8 oz cream cheese, softened – the star of our creamy dip
- 1/2 cup powdered sugar – to sweeten the cheesecake dip
- 1 tsp vanilla extract – for extra flavor in the dip
- 1/2 cup heavy cream, whipped – makes the dip light and airy
How to Make Red Velvet Brownie
- Step 1: First things first, let’s get our oven ready. Preheat it to 350°F (177°C). While the oven heats up, line a 9×13-inch baking pan with parchment paper. This makes removing the brownies so much easier later on!
- Step 2: In a large bowl, whisk together the melted butter, granulated sugar, red food coloring, and vanilla extract until you have a smooth, vibrant mixture. It should look like liquid velvet! Then, beat in the eggs one at a time until fully incorporated.
- Step 3: Now it’s time for the dry ingredients. Sift the all-purpose flour, unsweetened cocoa powder, and salt directly into the wet ingredients. Gently fold them together with a spatula until just combined. Be careful not to overmix – we want a tender brownie, not a tough one! This step helps create the perfect red velvet brownie batter.
- Step 4: Pour the luscious red velvet brownie batter into your prepared pan, spreading it evenly. Bake for 25-30 minutes. You’ll know they’re ready when a toothpick inserted into the center comes out with moist crumbs attached. This is how you know you’re on your way to making delicious how to make red velvet brownies.
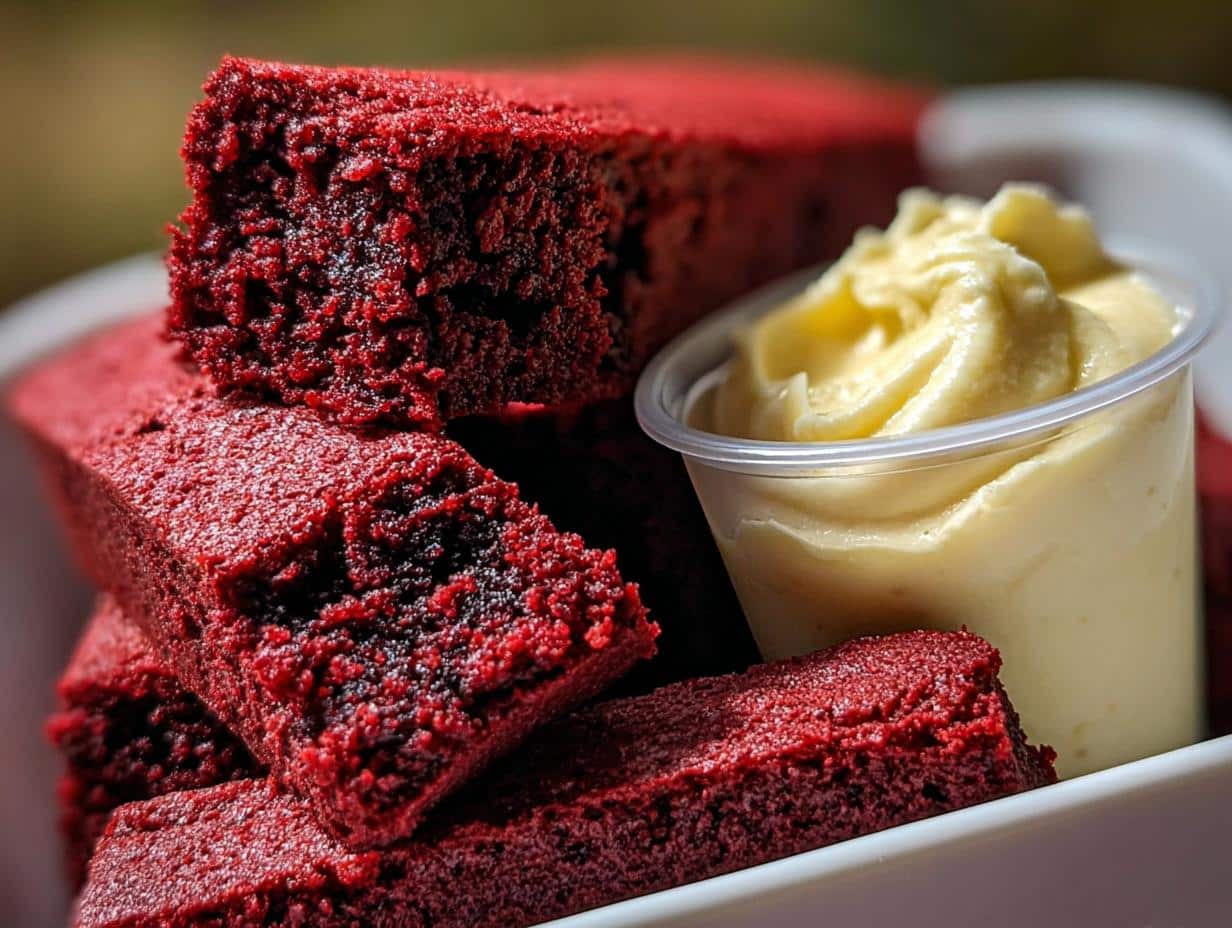
- Step 5: Let those gorgeous red velvet brownies cool completely in the pan. This is crucial for getting clean cuts. Once cooled, you can cut them into dipping sticks.
- Step 6: While the brownies are cooling, let’s whip up that irresistible cheesecake dip. In a separate bowl, beat the softened cream cheese, powdered sugar, and vanilla extract until it’s wonderfully fluffy and smooth.
- Step 7: Gently fold the whipped heavy cream into the cream cheese mixture. This will make the dip light, airy, and extra decadent.
- Step 8: Arrange your perfectly baked red velvet brownie sticks around the bowl of cheesecake dip. Now you know how to make red velvet brownies that are perfect for sharing!
Pro Tips for the Best Red Velvet Brownie
Follow these insider tips to guarantee your homemade red velvet brownies are the absolute best:
- Don’t overmix the batter! Overmixing can lead to tough brownies, so fold the dry ingredients in gently until just combined.
- For that signature vibrant color, use a gel-based red food coloring. It’s more concentrated than liquid versions and won’t thin out your batter.
- Letting the brownies cool completely before cutting is key. This allows them to set properly, ensuring clean cuts for dipping.
- Ensure your cream cheese and eggs are at room temperature for the smoothest cheesecake dip.
What’s the secret to perfect Red Velvet Brownie?
The secret to a truly perfect, fudgy red velvet brownie lies in the balance of ingredients and not overbaking. Using melted butter and the right ratio of cocoa to flour creates that signature dense, moist texture we all love.
Can I make Red Velvet Brownie ahead of time?
Yes, you absolutely can! Once cooled, store the baked brownie sticks in an airtight container at room temperature for up to 2 days before serving. The cheesecake dip is best made closer to serving time.
How do I avoid common mistakes with Red Velvet Brownie?
A common pitfall is overbaking, which leads to dry brownies. Watch for moist crumbs on a toothpick, not a clean one. Also, ensure your red food coloring is a good quality gel for the best color payoff without affecting the batter’s consistency.
Best Ways to Serve Red Velvet Brownie
These delightful red velvet brownies are incredibly versatile and can be served in so many fun ways! My favorite presentation is as dipping sticks alongside a rich cheesecake dip, creating a playful red velvet cheesecake brownie experience that guests adore. For a simpler approach, you can cut them into squares and serve them warm with a dusting of powdered sugar or a dollop of whipped cream. They also pair beautifully with a scoop of vanilla bean ice cream for a classic dessert combination. No matter how you serve them, these brownies are sure to be a showstopper!
Nutrition Facts for Red Velvet Brownie
Per serving (1 brownie stick with 1 tbsp dip):
- Calories: Varies based on exact portion size
- Fat: Varies based on exact portion size
- Saturated Fat: Varies based on exact portion size
- Protein: Varies based on exact portion size
- Carbohydrates: Varies based on exact portion size
- Fiber: Varies based on exact portion size
- Sugar: Varies based on exact portion size
- Sodium: Varies based on exact portion size
Nutritional values are estimates and may vary based on specific ingredients used for this delightful red velvet brownie dessert.
How to Store and Reheat Red Velvet Brownie
Proper storage is key to keeping your delicious red velvet brownies tasting fresh! Once they’ve completely cooled, I like to cut them into dipping sticks and store them in an airtight container. If you plan to enjoy them within 3-4 days, a cool spot on the counter is perfect for this delightful red velvet brownie dessert. For longer storage, wrap the cooled brownies tightly in plastic wrap, then in foil, and freeze them for up to 3 months. They hold up wonderfully!
When you’re ready to reheat frozen brownies, the best way is to thaw them overnight in the refrigerator. If you’re in a hurry, you can gently warm them in a low oven (around 250°F or 120°C) for about 5-10 minutes, just until they’re slightly soft. Avoid microwaving them for too long, as they can become rubbery. The cheesecake dip is best made fresh, so store any leftovers separately in the fridge.
Frequently Asked Questions About Red Velvet Brownie
What are red velvet brownies?
What are red velvet brownies? They are essentially brownies infused with the classic flavors and vibrant red color associated with red velvet cake. They typically have a rich, chocolatey base with a hint of tanginess and that signature deep red hue, often paired with cream cheese frosting or a similar creamy element.
Can I use a red velvet brownie mix instead of making them from scratch?
Yes, you can definitely use a red velvet brownie mix if you’re short on time or want a simpler baking experience. While homemade usually offers a richer flavor and better texture, a good quality mix can still yield delicious results. Just follow the package directions closely!
How do I get the best red velvet swirl brownie effect?
To achieve a beautiful red velvet swirl brownie look, you can make a simple cream cheese or white chocolate ganache. Dollop spoonfuls of the swirl mixture over the brownie batter in the pan. Then, use a toothpick or knife to gently swirl the topping into the batter, creating those lovely marbled patterns.
Why are red velvet brownies popular?
Why are red velvet brownies popular? It’s a combination of factors! They offer the comforting, fudgy texture of a classic brownie but with the visually striking red color and the unique flavor profile of red velvet, which is a delightful blend of chocolate and subtle tang. This makes them feel special and festive, perfect for celebrations.
Variations of Red Velvet Brownie You Can Try
Once you’ve mastered the basic red velvet brownie, there are so many fun ways to switch things up! For a richer flavor, try making a chocolate red velvet brownie by adding a bit more cocoa powder or even some chocolate chips directly into the batter. If you’re looking for a dietary variation, you can experiment with gluten-free flour blends or even try a vegan version by substituting the eggs and butter with plant-based alternatives. Another popular twist is the red velvet cheesecake brownie, where dollops of cream cheese mixture are swirled into the batter before baking, creating a delightful marbled effect and a creamy contrast.
Print
Red Velvet Brownie: 1 Easy Dreamy Recipe
- Total Time: 60 minutes
- Yield: Approximately 24-36 servings (depending on size of sticks) 1x
- Diet: Vegetarian
Description
Enjoy these fudgy red velvet brownie sticks served with a creamy cheesecake dip. This recipe offers a fun and interactive way to enjoy two beloved desserts, perfect for parties and gatherings.
Ingredients
- 1 cup unsalted butter, melted
- 1 1/2 cups granulated sugar
- 1 tbsp red food coloring
- 2 tsp vanilla extract
- 4 large eggs
- 1 1/4 cups all-purpose flour
- 1/4 cup unsweetened cocoa powder
- 1/2 tsp salt
- 8 oz cream cheese, softened
- 1/2 cup powdered sugar
- 1 tsp vanilla extract
- 1/2 cup heavy cream, whipped
Instructions
- Preheat oven to 350°F (177°C). Line a 9×13-inch pan with parchment paper.
- Whisk melted butter, sugar, red food coloring, and vanilla until smooth. Beat in eggs one at a time.
- Sift in flour, cocoa powder, and salt, folding until just combined to create the red velvet brownie batter.
- Pour batter into the prepared pan and bake for 25-30 minutes, or until a toothpick inserted into the center comes out with moist crumbs.
- Allow the red velvet brownies to cool completely in the pan before cutting them into dipping sticks.
- While the brownies cool, prepare the cheesecake dip by beating softened cream cheese, powdered sugar, and vanilla extract until fluffy.
- Gently fold the whipped heavy cream into the cream cheese mixture until smooth to create the cheesecake dip.
- Arrange the red velvet brownie dippers around the cheesecake dip for serving.
Notes
- For cleaner cuts, use a hot knife to slice the cooled brownies.
- Ensure ingredients for the dip are at room temperature for best blending.
- The brownies can be made ahead and stored at room temperature, while the dip is best made closer to serving time.
- Prep Time: 30 minutes
- Cook Time: 30 minutes
- Category: Desserts
- Method: Baking and Mixing
- Cuisine: American
Nutrition
- Serving Size: 1 brownie stick with 1 tbsp dip
- Calories: Varies based on exact portion size
- Sugar: Varies based on exact portion size
- Sodium: Varies based on exact portion size
- Fat: Varies based on exact portion size
- Saturated Fat: Varies based on exact portion size
- Unsaturated Fat: Varies based on exact portion size
- Trans Fat: Varies based on exact portion size
- Carbohydrates: Varies based on exact portion size
- Fiber: Varies based on exact portion size
- Protein: Varies based on exact portion size
- Cholesterol: Varies based on exact portion size
Keywords: Red Velvet Brownie, Red velvet brownie recipe, Easy red velvet brownie, Homemade red velvet brownie, Best red velvet brownie, Chocolate red velvet brownie, Red velvet swirl brownie, Red velvet cheesecake brownie, How to make red velvet brownies, What are red velvet brownies, Why are red velvet brownies popular, Red velvet brownie batter, Red velvet brownie mix, Fudgy red velvet brownie, Chewy red velvet brownie, Red velvet brownie with cream cheese frosting, Gourmet red velvet brownie, Red velvet brownie frosting recipe, Red velvet brownie bars, Red velvet brownie cookies, Red velvet brownie dessert
