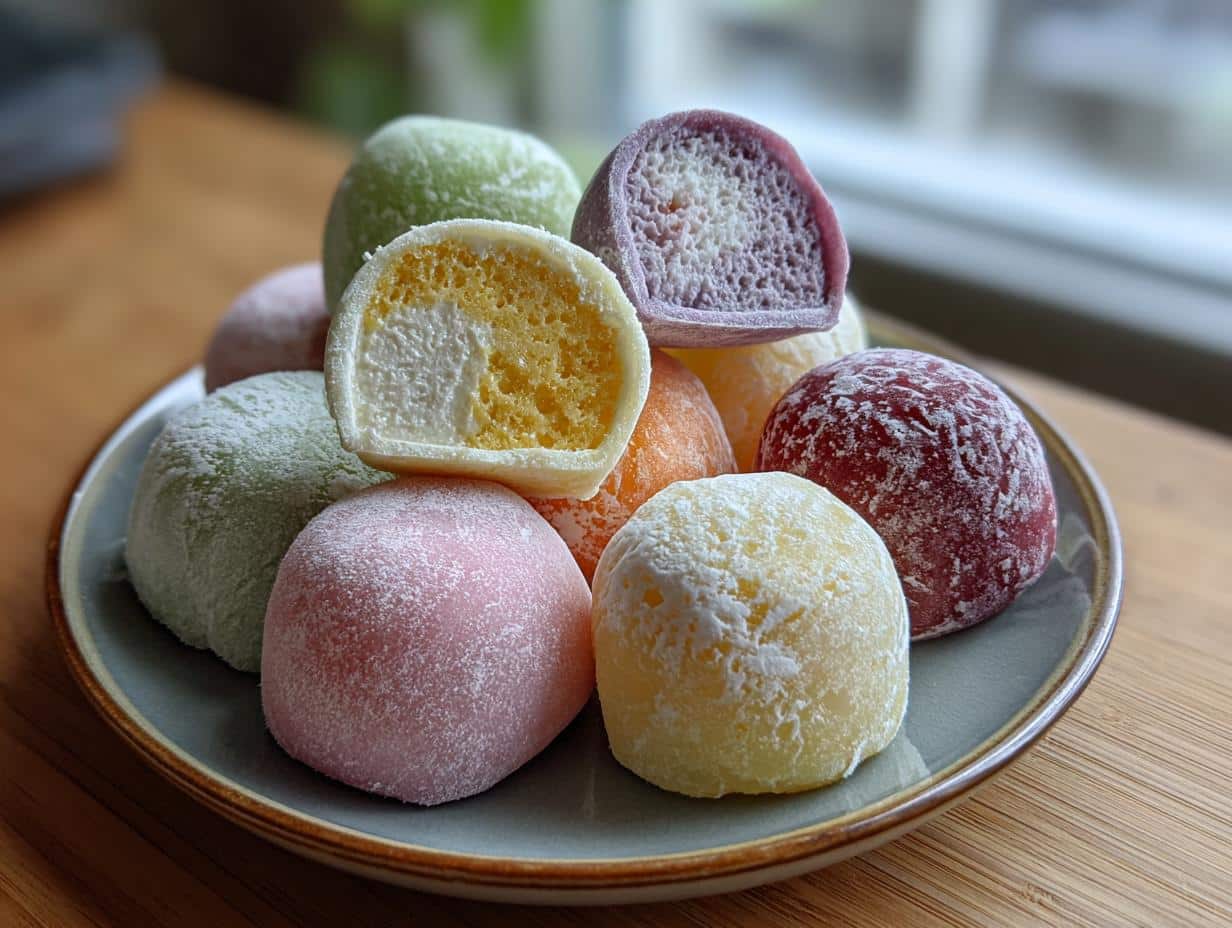
Mochi Ice Cream! Just saying it brings back a flood of memories. I remember being a kid, helping my grandma in the kitchen, carefully wrapping those little balls of ice cream in sweet, chewy rice dough. It always felt like magic. Now, I’ve taken that classic recipe and simplified it, so you can easily make this delightful treat at home. Forget complicated steps – this is an easy mochi ice cream recipe for beginners. Imagine biting into a perfectly chewy exterior that gives way to a burst of cold, creamy ice cream. It’s a textural dream! This homemade, bite-sized Japanese dessert is guaranteed to be a hit. Let’s get started!
Why You’ll Love This Mochi Ice Cream Recipe
Trust me, you’re going to fall head-over-heels for this mochi ice cream recipe! It’s just the perfect treat. Here’s why:
- You’ll get that perfectly sweet and chewy texture that everyone raves about. Seriously, it’s so satisfying!
- It’s totally customizable with your favorite ice cream flavors. Go wild – the sky’s the limit!
- Making these little guys is actually super fun and easy to do at home. It’s way easier than you think!
- Mochi ice cream is a unique and delicious dessert that’s a total crowd-pleaser.
- Get ready to impress your friends and family with your newfound dessert skills!
- This recipe requires minimal ingredients, so it won’t break the bank.
- It’s a fantastic kid-friendly activity – get the little ones involved in the fun!
Ingredients for Homemade Mochi Ice Cream
Alright, let’s gather our goodies! Here’s what you’ll need to whip up these amazing frozen treats. Don’t skimp on quality – it really makes a difference!
- 1 cup glutinous rice flour (sweet rice flour). I highly recommend either shiratamako or mochiko for that signature chewy texture. Trust me on this!
- ¼ cup sugar. This adds just the right amount of sweetness to the mochi dough. Not too much, not too little – Goldilocks would approve!
- 2 Tablespoons powdered sugar. This isn’t just for sweetness; it also helps create that smooth, delicate texture we all love.
- 1 cup water. Just plain ol’ water to hydrate the flour and bring our dough together.
- Food coloring (optional). Want to make your mochi ice cream extra fun? A few drops of food coloring can transform the dough into any color you like.
- Cornstarch or potato starch. This is key for dusting and rolling; it keeps the dough from sticking to everything.
- Ice cream. And finally, the star of the show! Your favorite flavor, of course. Make sure you scoop it into balls and freeze them beforehand!
How to Make Mochi Ice Cream: A Step-by-Step Guide
Ready to roll up your sleeves and make some magic? This guide will walk you through each step to create the perfect mochi ice cream at home. Don’t worry, it’s easier than it looks!
- Step 1: Freeze Ice Cream Balls: Line a sheet pan with parchment paper. Scoop your favorite ice cream into balls (about 1-inch in diameter) and place them on the parchment paper. Pop them into the freezer for at least 1 hour. This is crucial; we want them rock solid so they don’t melt everywhere when we wrap them in the dough!
- Step 2: Prepare the Mochi Dough: Grab a microwave-safe bowl and whisk together the glutinous rice flour, sugar, and powdered sugar. Slowly add the water, stirring until everything is smooth. Make sure you get rid of any lumps – nobody likes a lumpy dough!
- Step 3: Microwave the Dough: Cover the bowl tightly with plastic wrap. Microwave for 1 minute. Carefully remove (it’ll be hot!) and give it a good fold. Cover and microwave again for 1 minute. Fold again, then microwave for a final 30 seconds. If the dough still looks a little opaque, give it another 30 seconds until it’s translucent and sticky. The texture should be stretchy, like a marshmallow!
- Step 4: Roll Out the Dough: Generously dust a sheet of parchment paper with cornstarch – don’t be shy! Scrape the hot mochi dough onto the dusted parchment paper. Dust the top of the dough with even more cornstarch. Now, using a rolling pin, gently roll the dough into a large, thin rectangle, about 1/4 inch thick. The thinner the better!
- Step 5: Chill the Dough: Slide the parchment paper with the rolled-out dough onto a baking sheet and refrigerate for at least 30 minutes. This step is key – chilling makes the dough much easier to handle and prevents it from sticking to everything.
- Step 6: Cut and Fill: Once the dough is chilled, use a round cookie cutter (about 2-3 inches in diameter) to cut out circles. Brush off any excess cornstarch from the circles. Place a frozen ice cream ball right in the center of each circle.
- Step 7: Seal the Mochi Ice Cream: This is where the magic happens! Gently press the edges of the dough around the ice cream ball, pinching to seal it completely. Work quickly to prevent the ice cream from melting. If the dough is too sticky, just dust your fingers with a little more cornstarch.
- Step 8: Wrap and Freeze: Place each completed mochi ice cream on a small square of plastic wrap. Twist the plastic wrap tightly to seal it, and place it back in the freezer for at least 1 hour, or until firm. This helps them hold their shape.
- Step 9: Serve: When you’re ready to enjoy your homemade Japanese dessert, let the mochi ice cream thaw for just a few minutes before eating. This will soften the dough slightly, making it perfectly chewy and delicious!
Pro Tips for the Best Homemade Mochi Ice Cream
Want to take your mochi ice cream game to the next level? Here are a few tricks I’ve learned over the years to ensure your little treats are absolutely perfect. Trust me; these make a world of difference!
- Always, always freeze your ice cream balls for at least an hour, or even better, overnight. A super-cold, solid center is key to preventing meltdowns during assembly.
- Don’t skip the chilling step for the mochi dough. It makes it SO much easier to handle and cut. Plus, it helps the dough keep its shape.
- Be generous with the cornstarch! It’s your best friend when working with sticky mochi dough. Don’t be afraid to dust your hands, the rolling surface, and even the dough itself.

What’s the secret to perfect Mochi Ice Cream texture?
Okay, listen up: the key is all in the microwaving. You want that dough to be translucent and stretchy, like a perfectly melted marshmallow. Don’t be afraid to microwave it in short bursts (30 seconds at a time) until it reaches that consistency. This ensures a chewy, not gummy, texture.
Can I make Mochi Ice Cream ahead of time for a party?
Absolutely! In fact, I highly recommend it. Just assemble your mochi ice cream, wrap them individually in plastic wrap, and store them in a freezer-safe bag or container. They’ll keep perfectly for a week or two. Just let them thaw for a few minutes before serving for that perfect soft, chewy texture.
How do I prevent my Mochi Ice Cream from getting too sticky?
Stickiness is the enemy! The best way to combat this is by using plenty of cornstarch and working quickly. Also, make sure your ice cream is super frozen and your dough is properly chilled. If the dough starts getting too warm and sticky, pop it back in the fridge for a few minutes to cool down. You got this!
Best Ways to Serve Your Delicious Mochi Ice Cream
Alright, you’ve made these adorable little mochi ice cream treats—now what? Let’s talk serving suggestions! These are fantastic as a light and refreshing dessert after any meal, especially something a little spicy. I love serving them on a chilled plate with a few fresh berries for a pop of color and flavor. For a fun twist, you can also pair them with a drizzle of chocolate sauce or a sprinkle of matcha powder. They’re also the perfect bite-sized treat to serve at parties or gatherings—everyone always loves them! Trust me, these little guys disappear fast!
Nutrition Facts for This Mochi Ice Cream Recipe
Curious about what’s inside these delightful little treats? Here’s a quick rundown of the estimated nutrition per serving (one mochi ice cream):
- Calories: 70
- Sugar: 5g
- Sodium: 1mg
- Fat: 1g
- Saturated Fat: 1g
- Unsaturated Fat: 0g
- Trans Fat: 0g
- Carbohydrates: 16g
- Fiber: 1g
- Protein: 1g
- Cholesterol: 0mg
Please remember, this is just an estimate and may vary depending on the specific ingredients you use. Enjoy in moderation!
How to Store and Reheat Your Mochi Ice Cream
Okay, so you’ve managed to not eat all of your mochi ice cream in one sitting (impressive!). Now, let’s talk storage. The key is to keep them super cold to maintain that perfect texture. Store your homemade Japanese dessert in a freezer-safe bag or airtight container, making sure they’re individually wrapped in plastic wrap to prevent sticking. They’ll happily hang out in the freezer for up to 3 months. But, trust me, they never last that long! When you’re ready to enjoy one, let it thaw for just a few minutes at room temperature before diving in. This will soften the mochi slightly without melting the ice cream. Don’t even think about microwaving them—unless you want a soupy mess!
Frequently Asked Questions About Making Mochi Ice Cream
Got questions about making these delightful little treats? Don’t worry, I’ve got answers! Here are some of the most common questions I get asked about making mochi ice cream at home:
Why is my mochi dough so sticky?
Ah, the dreaded stickiness! This usually happens if there’s too much moisture in the dough or not enough cornstarch. Make sure you’re measuring your water accurately and don’t over-microwave the dough. Also, be super generous with the cornstarch when rolling and cutting. If it’s still too sticky, try chilling the dough for a bit longer.
Can I add more flour to fix sticky dough?
I wouldn’t recommend adding more flour, as it can make the dough tough. Instead, focus on using plenty of cornstarch and chilling the dough.
Can I use regular rice flour instead of glutinous rice flour?
Unfortunately, no. Regular rice flour won’t give you that signature chewy texture that defines mochi ice cream. You absolutely need glutinous rice flour (also known as sweet rice flour, mochiko, or shiratamako) for this recipe to work. It’s what makes the magic happen!
Where can I find glutinous rice flour?
Most Asian grocery stores carry it, and you can also find it online.
My ice cream is melting too fast! What can I do?
Melting ice cream is a common problem! Make sure your ice cream balls are rock-solid frozen before you start wrapping them in the mochi dough. Work quickly, and if the ice cream starts to melt too much, pop it back in the freezer for a few minutes to firm up. Also, make sure your mochi dough is properly chilled, as that will help keep the ice cream cold.
Does the type of ice cream matter?
Some ice creams melt faster than others. I find that denser, higher-fat ice creams (like gelato or premium brands) tend to hold their shape better than lighter, airier ones.
How long does homemade mochi ice cream last in the freezer?
When stored properly (individually wrapped and in a freezer-safe bag or container), your homemade mochi ice cream can last for up to 3 months in the freezer. However, for the best taste and texture, I recommend eating them within a month. After that, the dough might start to dry out a bit.
Can I refreeze mochi ice cream if it thaws?
I wouldn’t recommend refreezing it, as the texture will likely be compromised. The dough can become gummy, and the ice cream might get icy.
Fun Variations of Mochi Ice Cream You Can Try
Okay, you’ve mastered the basic mochi ice cream recipe—now it’s time to get creative! Here are a few fun variations to spice things up and cater to different tastes:
- Vegan: Swap out the regular ice cream for your favorite dairy-free alternative. There are tons of delicious vegan ice cream options available these days, from coconut-based to cashew-based.
- Gluten-Free: Good news! This recipe is naturally gluten-free, as it uses glutinous rice flour. Just double-check that your ice cream doesn’t have any sneaky gluten-containing additives.
- Fruity: Mix finely chopped fresh fruit (like strawberries, mangoes, or raspberries) into the ice cream before scooping and freezing. This adds a burst of natural sweetness and a fun textural element.
- Chocolate Lover’s Dream: Add a teaspoon of cocoa powder to the mochi dough for a rich chocolate flavor. Use chocolate ice cream for the filling, and maybe even drizzle a little melted chocolate on top before serving!

You can find more recipes on Pinterest!
Print
Mochi Ice Cream: Conquer this Dreaded Dessert
- Total Time: 2 hours 30 minutes
- Yield: 12 1x
- Diet: Vegetarian
Description
Homemade Mochi Ice Cream is a sweet and chewy Japanese rice cake filled with your choice of ice cream in a soft, slightly chewy, sweet rice dough.
Ingredients
- 1 cup glutinous rice flour (Sweet rice flour, I recommend shiratamako or mochiko)
- ¼ cup sugar
- 2 Tablespoons powdered sugar
- 1 cup water
- food coloring , optional, to change the color of the dough
- Cornstarch , or potato starch (for dusting and rolling)
- Ice cream , your favorite kind
Instructions
- Freeze ice cream balls: Line a sheet pan with parchment paper. Scoop ice cream balls and place them onto the parchment paper. Freeze for 1 hour.
- Make mochi: Combine flour, sugar, and powdered sugar in a microwave safe bowl. Add water and stir well until smooth. Cover with plastic wrap and microwave for 1 minute. Fold the mixture. Cover and microwave again for 1 minute. Fold the dough again and microwave for 30 more seconds. Microwave for 30 more seconds if needed.
- Roll dough: Dust parchment paper with cornstarch. Scrape the mochi dough onto the parchment paper. Dust the top of the dough ball with cornstarch. Roll the mochi dough into a large rectangle to a thickness of 1/4”. Refrigerate for 30 minutes.
- Cut plastic wrap: Use scissors to cut squares of plastic wrap.
- Fill the dough: Remove the dough from the fridge and use a round cookie cutter to cut circles in the dough. Brush off the cornstarch. Place one ice cream scoop in the center of the mochi and gently press the dough around the ice cream. Pinch the edges of the mochi to seal it. Place mochi on a piece of plastic wrap twist to seal it.
- Freeze: Place mochi back in the freezer with the twisted plastic wrap side down. Freeze mochi ice cream for at least 1 hour before eating. Store in a freezer safe bag for up to 3 months. Allow the dough to slightly thaw before eating.
Notes
- Variations:
- Vary the ice cream flavors: any flavor ice cream or sorbet will work!
- Swap the filling: instead of ice cream you could fill the center with nutella, chocolate, fresh cut strawberries, peanut butter, or traditional red bean paste (anko).
- Flavor the dough:
- Peanut butter: Mix in 2 Tablespoons of peanut butter right after the dough has steamed in the microwave.
- Chocolate/Cocoa Powder: Mix in 1 teaspoon cocoa powder before cooking.
- Matcha: Mix in 1 teaspoon matcha (green tea powder).
- Vanilla: Add one teaspoons of vanilla extract to dough before cooking.
- Coconut: Add 1 Tablespoon coconut milk to the dough before cooking
- Prep Time: 25 minutes
- Cook Time: 3 minutes
- Category: Dessert
- Method: Microwave
- Cuisine: Japanese
Nutrition
- Serving Size: 1
- Calories: 70
- Sugar: 5g
- Sodium: 1mg
- Fat: 1g
- Saturated Fat: 1g
- Unsaturated Fat: 0g
- Trans Fat: 0g
- Carbohydrates: 16g
- Fiber: 1g
- Protein: 1g
- Cholesterol: 0mg
Keywords: Mochi, Ice Cream, Japanese Dessert, Glutinous Rice Flour