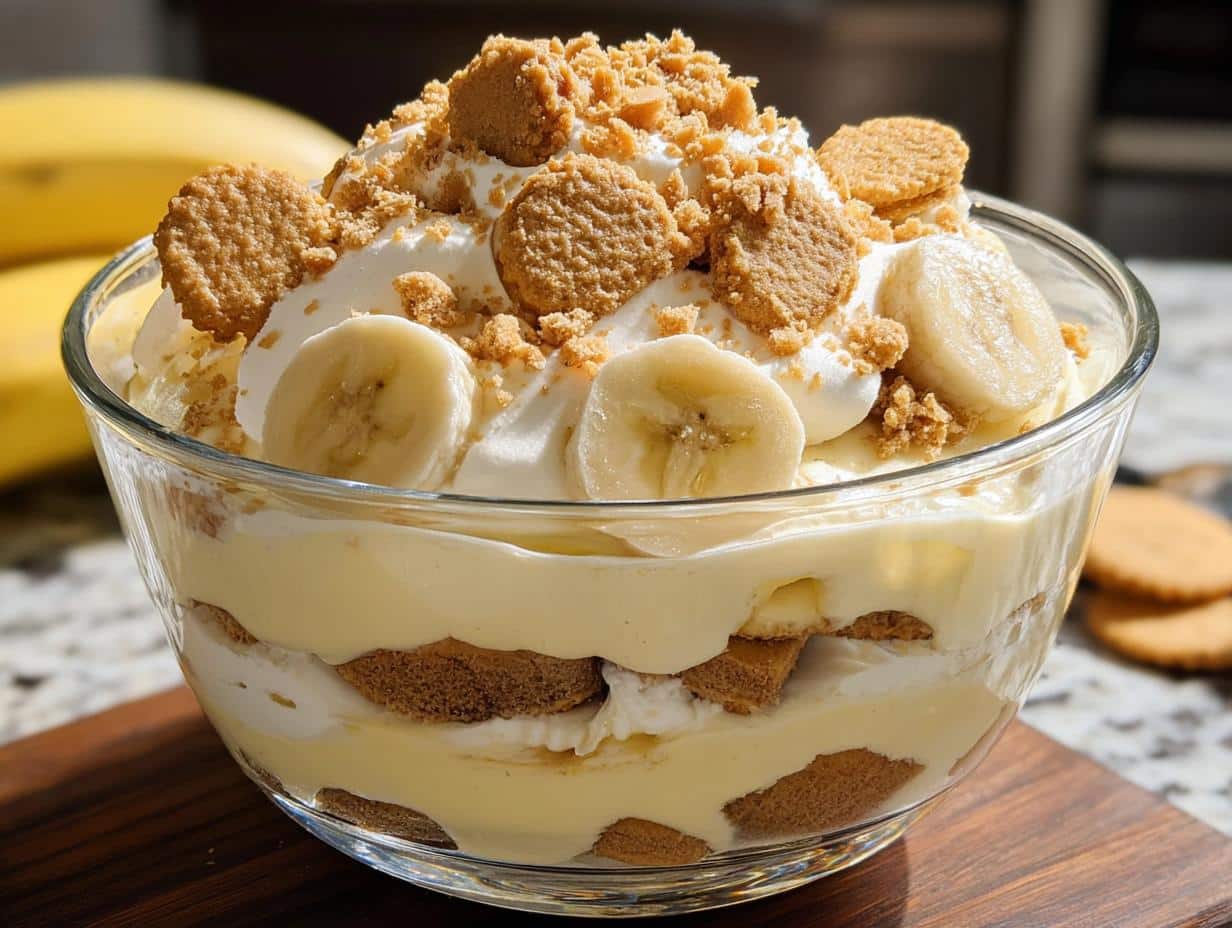
Banana Pudding Nilla Wafers have been my go-to dessert for years, ever since I first tasted my aunt Carol’s version at a family reunion. The combination of cool, silky vanilla pudding, sweet, ripe banana slices, and the satisfying crunch of Nilla Wafers is pure magic. It reminds me of lazy summer afternoons and the comforting aroma of home. This easy Nilla wafer banana pudding is so simple to whip up, and it always disappears fast! Let’s get cooking!
Why You’ll Love This Banana Pudding Nilla Wafers
You’re going to adore this classic dessert for so many reasons:
- It’s incredibly easy to assemble, making it a perfect weeknight treat.
- The combination of creamy pudding, fresh bananas, and crunchy wafers is simply irresistible.
- This easy Nilla wafer banana pudding requires no baking, saving you time and oven space.
- It’s a crowd-pleaser that everyone, from kids to adults, will rave about.
- The Nilla wafers provide a delightful textural contrast to the smooth pudding and soft bananas.
- Assembling this layered banana pudding dessert is almost as fun as eating it!
- This easy Nilla wafer banana pudding is a fantastic make-ahead option for parties.
- It delivers that comforting, nostalgic taste of homemade goodness.
Ingredients for Homemade Banana Pudding Nilla Wafers
Gathering these simple ingredients is the first step on your journey to the best banana pudding Nilla wafers. The magic truly happens with the combination of creamy pudding and the crisp texture of Nilla wafers for banana pudding. Here’s what you’ll need:
- 1 (14 oz) can sweetened condensed milk – this forms the rich, sweet base of our pudding.
- 1 cup very cold milk – essential for creating a thick, creamy pudding.
- ½ cup very cold water – helps achieve the perfect pudding consistency.
- 1 (3.4 oz) box instant vanilla pudding mix – the instant variety makes this a quick dessert.
- 1 (11-12 oz) box Nilla Wafers – these are key for that classic texture and flavor. Reserve about 5-6 wafers for a pretty garnish.
- 3 cups heavy whipping cream – whipped to perfection, this adds an airy lightness.
- ½ teaspoon clear vanilla flavoring – enhances the vanilla notes without adding color.
- 5 barely ripe bananas, sliced – use bananas that are just starting to spot for the best flavor and texture.
How to Make Banana Pudding with Nilla Wafers
- Step 1: In a large mixing bowl, pour in the sweetened condensed milk, followed by the very cold milk and water. Whisk these together on a low to medium speed for about 1-2 minutes until everything is beautifully smooth.
- Step 2: Add the entire box of instant vanilla pudding mix to the sweetened condensed milk mixture. Beat with an electric mixer on medium speed for 2 minutes. You’ll see it start to thicken and get wonderfully creamy. Cover the bowl securely and refrigerate for at least 4 hours, or even better, overnight. This chilling time is crucial for the best Nilla wafer banana pudding texture.
- Step 3: While the pudding chills, prepare the whipped cream. In a separate, clean bowl, whip the heavy whipping cream with the clear vanilla flavoring. Continue whipping until stiff peaks form – you know, when you can lift the beater and the cream stands up straight!
- Step 4: Once the pudding is thoroughly chilled and set, gently fold the whipped cream into it. Use a spatula and a light hand to combine them until the mixture is uniform and smooth. This step creates the luscious, airy base for your homemade banana pudding Nilla wafers.
- Step 5: Now for the fun part – assembly! Grab your favorite trifle dish or a large serving bowl. Start by arranging one-third of the Nilla Wafers on the bottom. Top this layer with one-third of your sliced bananas, then spoon over one-third of the creamy pudding mixture.
- Step 6: Repeat the layering process two more times. Add another layer of Nilla Wafers, followed by bananas, and then the pudding mixture. Make sure to spread the pudding evenly so every bite of this classic banana pudding Nilla wafers is perfect.
- Step 7: Crush the reserved Nilla Wafers into coarse crumbs. Sprinkle these generously over the top layer of pudding for a delightful crunch and a beautiful finish.
- Step 8: Cover the entire dish tightly with plastic wrap and refrigerate for at least 30 minutes before serving. This allows the flavors to meld together and ensures your classic banana pudding Nilla wafers are perfectly chilled and ready to enjoy.

Pro Tips for the Best Banana Pudding Nilla Wafers
Achieving that perfect, creamy texture and delightful crunch is easier than you think with these insider tips for your banana pudding Nilla wafers.
- Use barely ripe bananas. Overripe bananas can make the pudding too mushy and brown quickly.
- Chill the pudding mixture thoroughly. This is essential for the pudding to set properly and for the wafers to soften just enough without becoming soggy.
- Don’t overmix the whipped cream. Whip it until stiff peaks form, but stop there to keep it light and airy.
- Assemble the dessert close to serving time if you prefer a firmer wafer texture.
What’s the secret to perfect Banana Pudding Nilla Wafers?
The secret lies in the chilling time for the pudding and using Nilla wafers strategically. Why use Nilla wafers in banana pudding? Their crisp texture creates a delightful contrast that’s essential to the classic flavor profile. For more dessert inspiration, check out these last recipes.
Can I make Banana Pudding Nilla Wafers ahead of time?
Yes, you absolutely can! For the best results, assemble the banana pudding Nilla wafers up to 12 hours in advance. This allows the flavors to meld beautifully and the wafers to soften slightly.
How do I avoid common mistakes with Banana Pudding Nilla Wafers?
A common pitfall is using overly ripe bananas, which can lead to a mushy dessert. Also, be sure to chill the pudding long enough; under-chilling results in a runny consistency. Lastly, don’t let the wafers sit too long before serving if you want that perfect balance of soft and crisp. Learn more about proper chilling techniques for desserts here.
Best Ways to Serve Banana Pudding Using Nilla Wafers
This delightful dessert is wonderfully versatile, whether you’re serving it at a casual get-together or a more formal meal. For a true taste of tradition, consider pairing a generous scoop of this Southern banana pudding Nilla wafers with a light, fluffy slice of pound cake or a simple glass of iced tea. It’s also fantastic served alongside fresh berries like raspberries or blueberries for a pop of color and tartness. For an extra special touch, a dollop of extra whipped cream and a sprinkle of toasted coconut make this layered banana pudding dessert truly shine. If you enjoy this, you might also like our cosmic brownie bites.
Nutrition Facts for Creamy Banana Pudding Nilla Wafers
This delightful dessert is a treat, and here’s a look at the estimated nutritional breakdown per serving of this creamy banana pudding Nilla wafers.
- Calories: 320
- Fat: 15g
- Saturated Fat: 8g
- Protein: 4g
- Carbohydrates: 45g
- Fiber: 2g
- Sugar: 30g
- Sodium: 250mg
Nutritional values are estimates and may vary based on specific ingredients used. For more healthy dessert options, consider our healthy kit kat recipe.
How to Store and Reheat Old Fashioned Banana Pudding Nilla Wafers
Properly storing your delicious old fashioned banana pudding Nilla wafers ensures you can enjoy it for days to come. Once the dessert has cooled slightly, cover it tightly with plastic wrap or transfer it to an airtight container. This homemade banana pudding Nilla wafers will keep well in the refrigerator for about 3 to 4 days. Unfortunately, freezing isn’t ideal for this layered banana pudding dessert, as the texture of the bananas and pudding can suffer. If you absolutely must freeze it, wrap individual portions very well, but be prepared for a softer texture upon thawing. Reheating isn’t typically necessary, as this classic banana pudding with Nilla wafers is best served chilled. You might also enjoy our nutter butter bars.
Frequently Asked Questions About Layered Banana Pudding Nilla Wafers
What is the best way to make banana pudding Nilla wafers?
To make the best banana pudding Nilla wafers, start by ensuring your pudding is thoroughly chilled and set. This is key for achieving a firm texture. Layering is also important; make sure to distribute the Nilla wafers, bananas, and pudding evenly for a beautiful presentation and consistent flavor in every bite of your layered banana pudding Nilla wafers.
Can I use other cookies instead of Nilla wafers for banana pudding?
While Nilla wafers are traditional and provide a unique flavor and texture, you can experiment with other cookies. Shortbread cookies or even vanilla wafers will work, but they might alter the classic taste. For the most authentic experience, sticking to Nilla wafers is best for that perfect homemade banana pudding Nilla wafers flavor.
How do I prevent my bananas from browning in the banana pudding Nilla wafers?
To prevent browning in your banana pudding Nilla wafers, slice your bananas just before you assemble the dessert. You can also toss them gently with a little lemon juice before layering. This helps slow down the oxidation process, keeping your layered banana pudding Nilla wafers looking fresh and appealing. Lemon juice is a great way to preserve fruit, similar to how it’s used in some apple salad recipes.
What is the ideal chilling time for this layered banana pudding Nilla wafers?
For the best texture and flavor melding, I recommend chilling your layered banana pudding Nilla wafers for at least 2-4 hours. Overnight chilling is even better, as it allows the Nilla wafers to soften slightly while still maintaining some of their delightful crunch, creating the perfect balance for this classic dessert.
Variations of Banana Pudding Dessert Nilla Wafers You Can Try
Once you’ve mastered the classic, why not get creative with your banana pudding dessert Nilla wafers? There are so many fun ways to put your own spin on this beloved treat. For a lighter option, you could try a low-sugar version by using sugar-free pudding mix and a sugar substitute in the whipped cream, making for a simple banana pudding Nilla wafers that still satisfies. If you’re looking for a chocolatey twist, swap out some of the Nilla wafers for chocolate wafers or even add a layer of chocolate pudding. For a richer, more decadent experience, consider using a banana cream pudding instead of vanilla. These variations keep the spirit of the original while offering new flavors and textures to explore.


Banana Pudding Nilla Wafers: 5 Tasty Tips
- Total Time: 4 hours 20 minutes
- Yield: 10 servings 1x
- Diet: Vegetarian
Description
A classic no-bake banana pudding made with layers of creamy vanilla pudding, fresh banana slices, and crunchy Nilla Wafers. This comforting dessert is easy to prepare and perfect for any occasion.
Ingredients
- 1 (14 oz) can sweetened condensed milk
- 1 cup very cold milk
- ½ cup very cold water
- 1 (3.4 oz) box instant vanilla pudding mix
- 1 (11-12 oz) box Nilla Wafers (reserve 5–6 wafers for garnish)
- 3 cups heavy whipping cream
- ½ teaspoon clear vanilla flavoring
- 5 barely ripe bananas, sliced
Instructions
- In a mixing bowl, combine the sweetened condensed milk, very cold milk, and very cold water. Mix on low-medium speed for 1-2 minutes until smooth.
- Add the instant vanilla pudding mix and beat on medium for 2 minutes until the pudding begins to thicken. Cover and refrigerate for at least 4 hours or overnight to fully set. This is a crucial step for the best Nilla wafer banana pudding texture.
- In a separate bowl, whip the heavy cream with vanilla flavoring until stiff peaks form.
- Gently fold the whipped cream into the chilled pudding mixture until smooth and uniform. This creates the creamy base for your homemade banana pudding Nilla wafers.
- To assemble, line the bottom of a large serving bowl or trifle dish with one-third of the Nilla Wafers. Add a layer of sliced bananas, followed by one-third of the pudding mixture.
- Repeat the layers two more times: Nilla Wafers, bananas, and pudding. Ensure even distribution for a beautiful layered banana pudding dessert.
- Crush the reserved Nilla Wafers and sprinkle them on top for garnish.
- Cover the dish and refrigerate until ready to serve. This classic banana pudding with Nilla wafers is best served chilled.
Notes
- Use barely ripe bananas for the best texture and to prevent browning.
- Slice bananas just before assembling to keep them fresh.
- Leftovers can be stored in the refrigerator for up to 3 days.
- For a different flavor, try swapping vanilla pudding for banana or butterscotch.
- Prep Time: 20 minutes
- Cook Time: 0 minutes
- Category: Dessert
- Method: No-Bake
- Cuisine: American
Nutrition
- Serving Size: 1 serving
- Calories: 320
- Sugar: N/A
- Sodium: N/A
- Fat: N/A
- Saturated Fat: N/A
- Unsaturated Fat: N/A
- Trans Fat: N/A
- Carbohydrates: N/A
- Fiber: N/A
- Protein: N/A
- Cholesterol: N/A
Keywords: banana pudding, Nilla wafers, Nilla wafer banana pudding, homemade banana pudding, easy banana pudding, classic banana pudding, southern banana pudding, creamy banana pudding, old fashioned banana pudding, layered banana pudding